Pages

Showing posts with label nuno. Show all posts

Thursday, October 14, 2010

Getting things done.

Bri said " gee that wont keep you warm, look at all those holes..."
"It's a SUMMER scarf" said I.


How it sat for a month before deciding to put holes in it......


How it began....


When I haven't made anything for a while I begin to get a bit miserable and frustrated. Life, family and other committments creep time away from the creative process and it's easy to push creativity into 'I'll get to it later mode'.
Thing is, it's a vital part of who I am and want to be. If I ignore my needs and let too much of other people's needs take precedence, I lose confidence and become frustrated. That in turn causes me to not be competent in my other roles. Mother, wife, daughter, business women, friend, community member. My mother used to say that if you don't take care of the mother, who will take care of the children. I think she meant for ourselves to take care of us first so we can effectively take care of the people who rely on us. She was a midwife who saw first hand the breakdown of families when the mother gave her all and was made ill by it. So yesterday, I took time out to finish the scarf that had been sitting on our dining room table for more than a month. The silk scraps came from a shirt from the op shop. The silk merino is a colourway I dyed with the sky above Warrandyte in mind. Even just finishing a scarf made me feel better about myself. A small thing maybe but at the moment- a huge achievement.

Tuesday, June 15, 2010

Grey days in Melbourne


Belle pretending to eat the wrap that I was heating in the microwave. After a while of felting or rolling, it gets cold pretty quick so I shove it into the microwave. It's probably more tasty than what I could cook! Rae is taking photos of it for me now it's finished. The wrap, not the microwave....


It's been grey and overcast the last few days, and I miss the sunlight. So it was back to the dyeing shed to dye the colours of a Melbourne winter. It's called Pilgram by Madelen who is pretty pleased she came up with the name.
I usually don't go for blogs that are all of people's pets, but I really had to include a pic of Bella's bunny Uki.

Saturday, June 12, 2010

I bought myself a present!


I joined a felt/ filz flickr group so I now have morning coffee whilst browsing the new photos put up each day of other's felting projects. Marina put up a photo of a new scarf and I POUNCED! Soooo my colours and I love the texture. Besides that- all Melbounians would agree it's been freezing here! ( Ok, not freezing as in actual freezing but rotten cold anyway) No, I definitely need a new scarf. I have my old favorite red one Rae bought me, but it's an all weather scarf, not ' I'm freezing my bum off' scarf. So these are the pics
.
My next post will be what this is turning into. 3metres of Rae's muslin and about 100 grams of a 'one of 'slushie I've been hoarding. I think it took three hours to lay out.
Next pic is another felted bracelet in Federation colour way.

Wednesday, June 9, 2010

Spring Cleaning in Winter


I am supposed to be designing some new kits for the up and coming show at Jeff's Shed that Rae and I do each year. But, I don't like stocking the stand with my old designs so I thought I would post one of the scarves up for anyone who wants to have a go. This one I like because it enables me to showcase Rae's lovely fabric pieces and offcuts rather than having to use a whole piece of silk tissue the length of the scarf.
Enjoy.
  1. Place sheet of bubble wrap bubble side up on a table covered with towels.
  2. Place silk fabric pieces on the bubble wrap where you want them to go. I placed a piece of fabric each end to become a fringe. When the merino felts, it gathers up the silk into a lovely flowing fringe. I left 20cm of the fabric out of the scarf to become the fringe. I also ripped up pieces of the silk and placed bands of it along the length of the bubble wrap, not placing the merino on the silk but overlapping it a little so the silk would catch.
  3. Hold the merino loosely in one hand and using all your fingers against the fat part of your palm pull away a layer of merino fibres and lay them on your bubble wrap, starting 15cm from one end. I pull away a sheer or thin layer and over lap them slightly fibres all pointing north south along the bubble wrap until I have a rectangle 30cm x180cm. Pull away another sheer layer and overlap them east west over the top of your first layer. The amount of merino in this kit is exactly right for the scarf so make sure you pull away less rather than more (40-50 grams). Anymore and the scarf would be too thick.

Now is the time to lay on any decorative elements you might want to add. Silk fabrics, yarns, wools, other colours are all good! To make swirls or circles, pull away a small amount of fibre and roll it into a snake using slightly wet hands. (You are felting it) Lay the swirl down in the position you want. To help hold it in position place a very sheer layer of merino over it. If you have silk hankies , separate the layers and lay them down on the merino. (One hankie will separate into several layers, I like to distort them rather than keep them square.)

  1. Lay the nylon net over your scarf and pour warm water over it patting the surface gently to encourage the water to soak in. The water stays mostly on the bubble wrap so be liberal with it. All the fibres need to be wet. Rub over the net with a bar of low suds soap. Remove the net carefully and place your hand in a plastic shopping bag and softly rub the surface of the scarf for about five minutes.
  2. Check the edges of the scarf and if you don’t like the irregular edges, fold them back over. I usually don’t worry and tend to give the scarf a trim with scissors a little further on in the felting process.
  3. Continue to rub the scarf with your hand in the bag for another 5 minutes.
  4. Now roll the bubble wrap and scarf into a tight sausage and tie some sting around each end to hold it. It looks like a giant bon bon. Now without pressing hard just roll it back and forth 150 times. You can do this in front of the tv or get the kids to do it! Unroll it carefully. You should be able to see the fibres are starting to interlock and move through the weave of the fabric. The silk will start to crinkle up as the fibres travel through it and begin to shrink. Carefully turn the scarf over and straighten, reroll the bubble wrap and roll again 150 times. Unroll.
  5. If you feel the scarf is shrinking too much in one direction, Rub it by hand up and down the way you want it to shink. Its probably time to cut away any daggy bits from the overall shape.
  6. I like to roll the bubble wrap length wise as well into a long sausage and roll. It helps keep the scarf’s shape.
  7. Roll, and keep turning the scarf over on the bubble wrap after every 100 rolls
  8. By now you should be able to see the migration of surface fibres through to the back, some to the front, general shrinkage of the scarf and not be able to pinch fibres away from the surface without them breaking. Generally though, Your scarf is felted when it has shrunk by a third. Or, do a 'pinch test'. Pinch some fibres on the surface and pull, if they come up as a pyramid- it's not felted. If they come up like a tree trunk and begin to break- they are felted. To speed felting up, you can apply warm/ hot water, and pick the scarf up and drop it back down to the bubble wrap several times- shocking the fibres. Beware with this technique, felting happens fast but it can cause the scarf to loose its shape.
  9. There are many techniques for felting, every felt maker swears by their own technique, so don’t feel obliged to follow mine. It works for me though. When you feel the scarf is felted enough and shrunk enough, rinse it out, pull it into shape and hang to dry. I iron my scarf on a medium setting.

Friday, May 14, 2010

More pics


Wandering around the web I found a picture of Arlene's nuno wrap made with Rae's cotton gauze. I love it. Have added Arlene's link if anyone wants to visit.
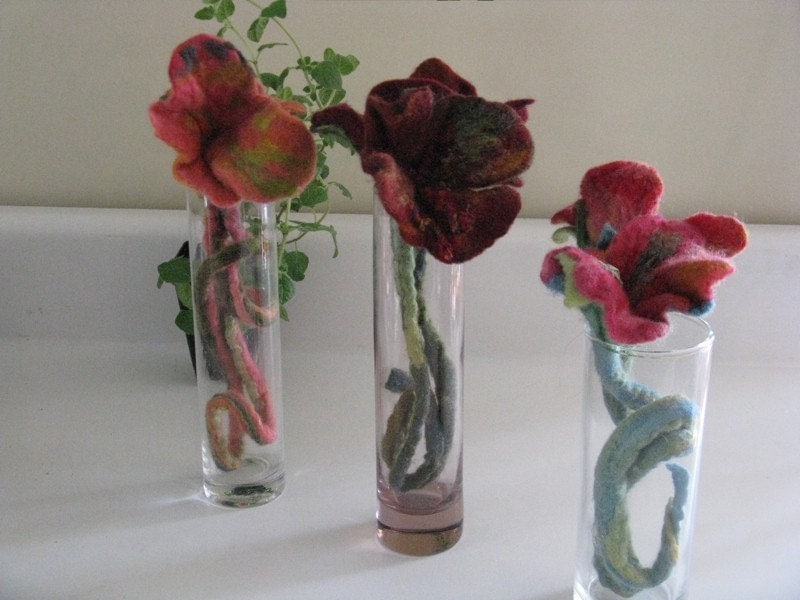
Also catching my eye is the felted flowers by Ginny, a fellow Etsian. Follow the link to visit her shop.

Thursday, May 6, 2010

Another Piece On The Go


Hand dyed woolen blanket, silk sequined fabric, silk chiffon, silk/ rayon velvet and silk dupion, hand dyed of course.
Waiting for stitch, or applique, or stamping or.......
Looks like brains.....

I think I used the colourway Rivendell for the felt part.
Too tired last night to put these photos up. These two pieces are the front and back of a book. People may recognize it from a sample begun in Orange. It worked great but I'm a lover of useful things and felt that a book cover or bag was a way of seeing it more often. Students also might remember me stressing the importance of rolling felt with velvet in it gently, really gently. Once my velvet caught, I popped the felt into the non slip matting recommended by Maris and it felted in a shot.
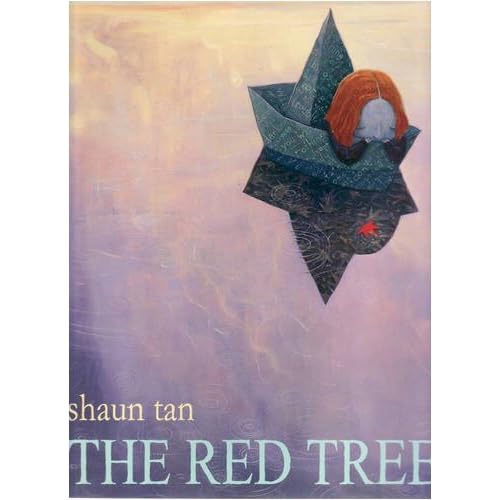
The piece was photographed on book pages from Shaun Tan's book The Red Tree. He is my favorite illustrator and I find infinite inspiration from the pages of his books. The colours, characters and techniques are amazing.